

Power BI: The thundercloud that has revolutionized Data Visualization.
Microsoft Power BI is a suite of digital tools for optimum data management, storage, reporting, and visualization. Since its inception in 2011, Power BI has proven to be an intelligent business resource. Sorting, organizing, and communicating tons of cells of data in a matter of a few clicks – BI has disrupted the way data is handled in organizations across the globe.
From simple components like maps, bar charts, and pie charts to complex models such as gauges, funnels, and waterfalls – Power BI has simplified data visualization to a remarkable extent with its user-friendly interface, default visualization tools, and other notable features. It is also compatible with external sources like Excel and SQL Server, enabling everyone to visualize & analyze data faster, smartly, and efficiently.
The Significance of Data Visualization
Data visualization is about more than just creating attractive charts and graphs. It’s about transforming raw data into an understandable format, making it easier to identify patterns, trends, and insights that drive informed decision-making. The ability to quickly interpret complex data sets is crucial in today’s data-driven world. According to a study by Domo, by 2020, the world generated 1.7 MB of data every second for every person on Earth. This exponential growth underscores the necessity of practical data visualization tools.
Well-crafted data visualizations can reveal insights that are otherwise hidden in raw data. They help businesses understand their performance, identify areas for improvement, and predict future trends. With its extensive suite of visualization tools, Power BI empowers organizations to harness the power of their data, making complex analyses accessible to all levels of the organization.
How can you use Power BI for Data Visualization?
Power BI offers a myriad of features that enhance data visualization. Here is a step-by-step guide to getting Data Visualization started on Power BI.
Basic Visuals
Bar and Column Charts
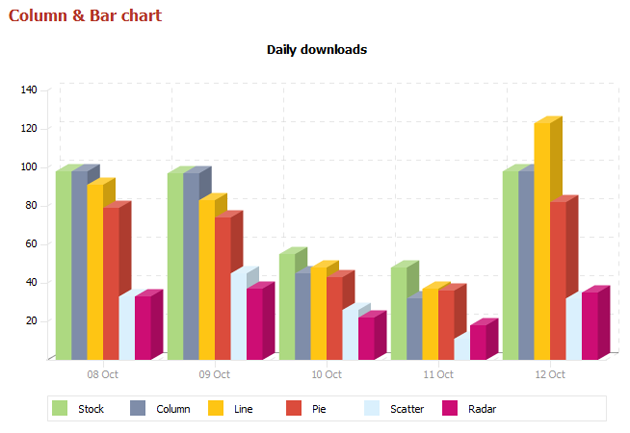
Bar and column charts are fundamental visualization tools in Power BI, commonly used to compare data across different categories. To create a bar or column chart:
- Import Your Data: Load your dataset into Power BI. You can do this by selecting your data source and importing the data into the Power BI environment.
- Select the Chart Type: On the Power BI desktop, go to the “Visualizations” pane. Select the “Stacked Bar Chart” or the “Stacked Column Chart” icon.
- Add Data to the Chart: Drag and drop the relevant data fields from your dataset to the “Values” and “Axis” areas. For example, to compare sales by region, place “Sales” in the “Values” area and “Region” in the “Axis” area.
- Customize the Chart: Use the “Format” pane to customize your chart. You can change colors, add data labels, and modify the axis titles to enhance readability.
Line Charts
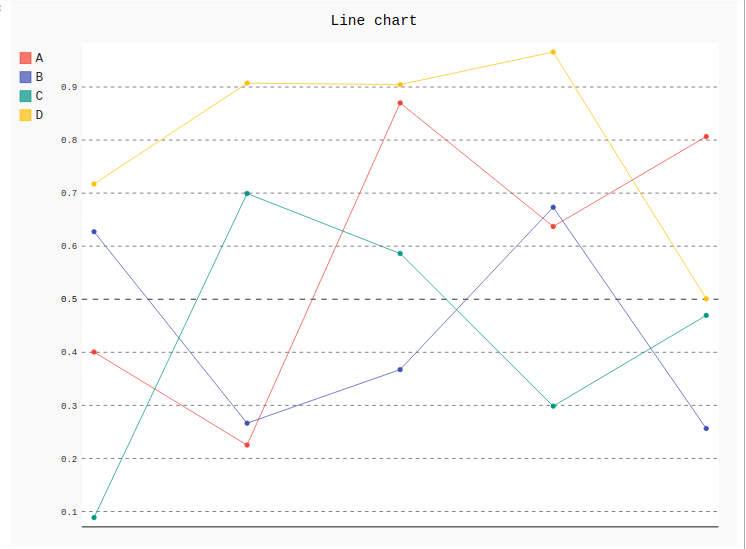
Line charts are excellent for tracking changes over time, such as trends in sales or website traffic. To create a line chart:
- Prepare Your Data: Ensure your dataset includes a time series dimension, such as dates or years.
- Choose the Line Chart: In the “Visualizations” pane, select the “Line Chart” icon.
- Set Up the Chart: Drag your time series field (e.g., Date) to the “Axis” area and the metric you want to track (e.g., Sales) to the “Values” area.
- Enhance the Chart: Customize your chart through the “Format” pane. You can adjust line styles, add markers to data points, and include a legend to make your chart more informative.
Pie and Donut Charts
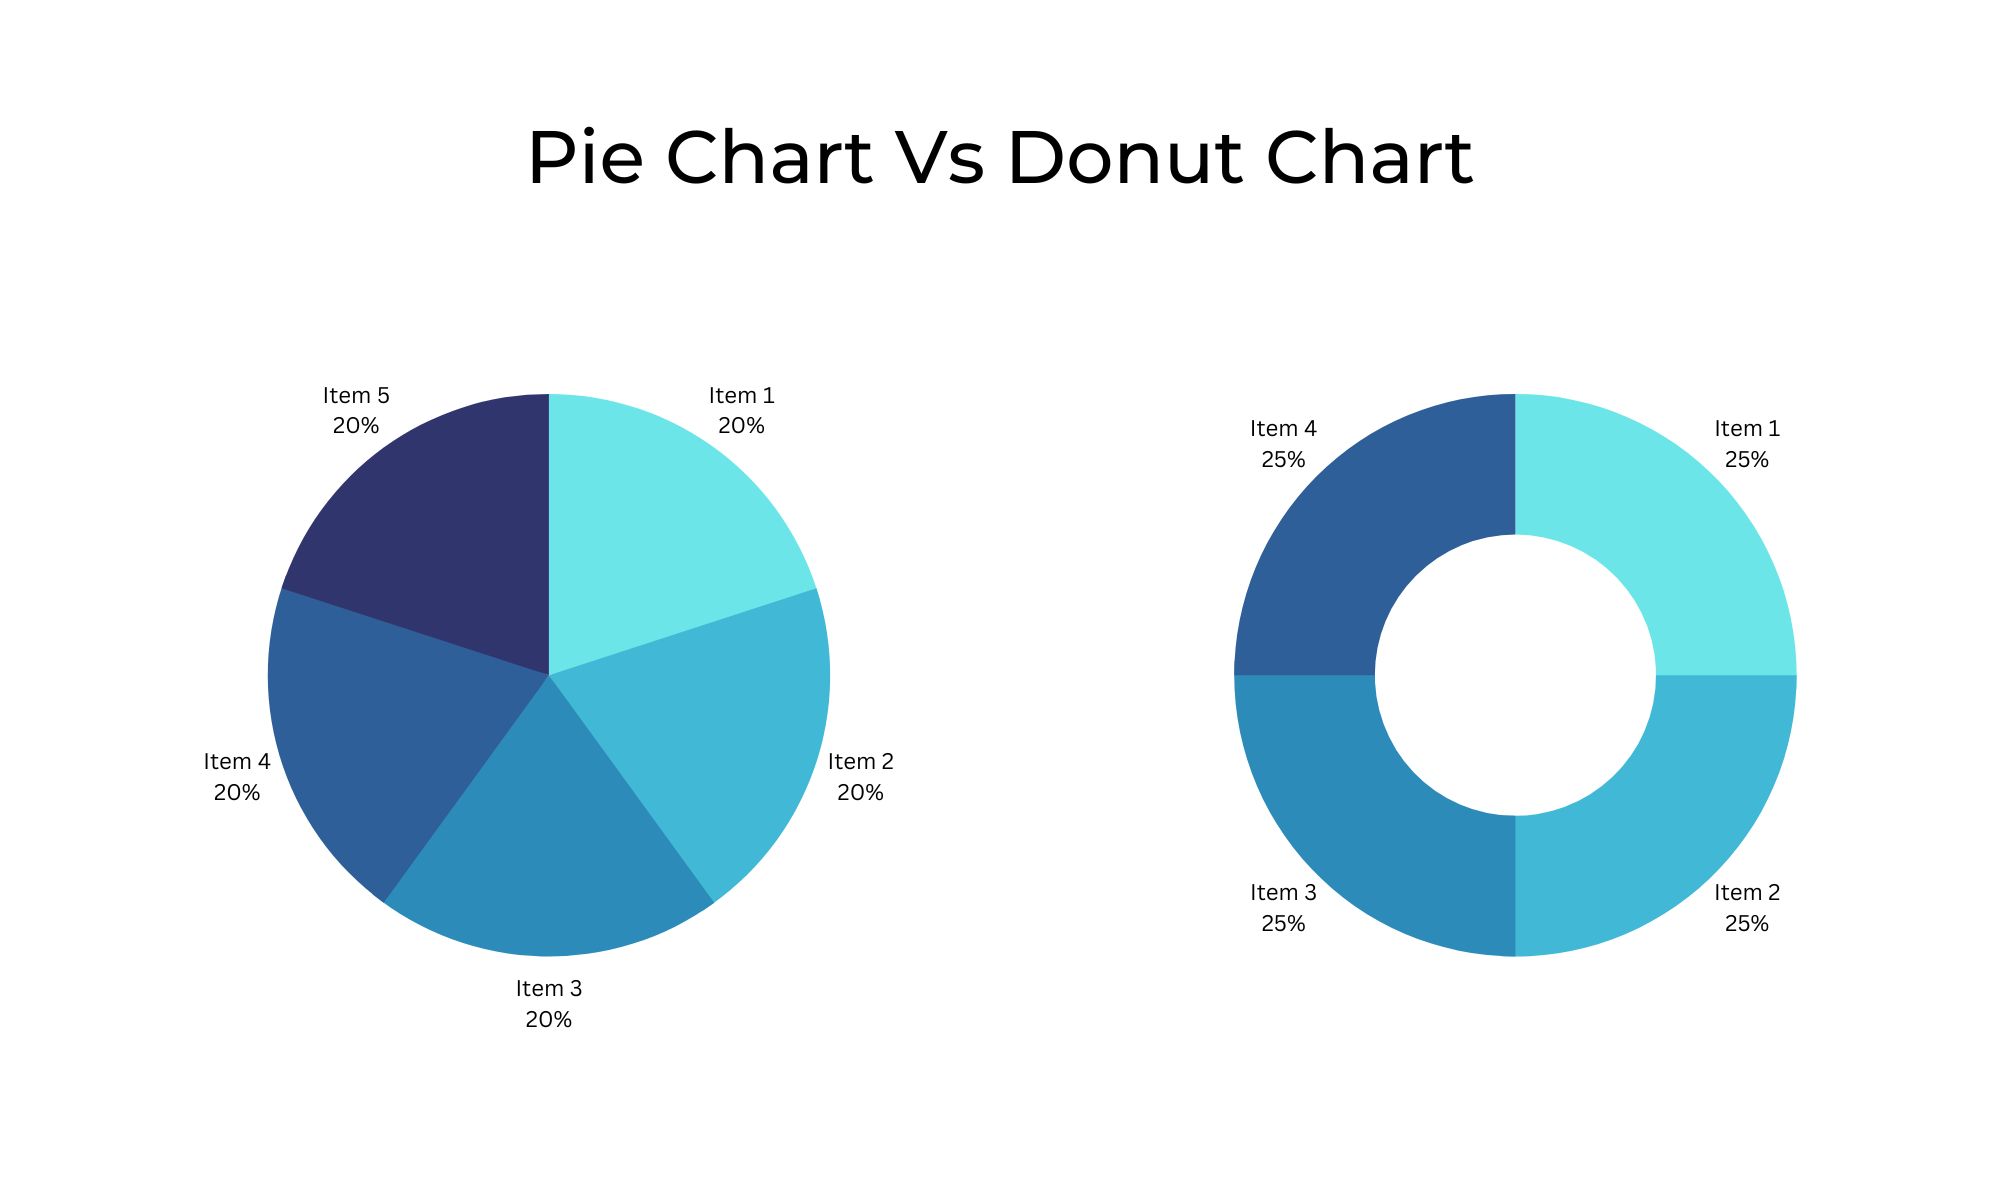
Pie and donut charts help show proportions and compare parts of a whole. To create a pie or donut chart:
- Import Data: Load your dataset, ensuring it includes the categories and values you want to compare.
- Select the Chart Type: In the “Visualizations” pane, choose either the “Pie Chart” or “Donut Chart” icon.
- Assign Data Fields: Drag the category field (e.g., Product Category) to the “Legend” area and the values field (e.g., Sales) to the “Values” area.
- Customize Your Chart: Use the “Format” pane to adjust the chart’s appearance. You can modify colors, add labels, and create tooltips for additional context.
Advanced Visuals
Tree Maps

Treemaps are ideal for visualizing hierarchical data and showing proportions within categories. To create a treemap:
- Prepare Hierarchical Data: Ensure your dataset includes hierarchical fields, such as categories and subcategories.
- Choose the Tree Map: In the “Visualizations” pane, select the “Tree Map” icon.
- Set Up the Tree Map: Drag the hierarchical fields to the “Group” and “Values” areas. For example, place “Category” in the “Group” area and “Sales” in the “Values” area.
- Customize the Visual: Use the “Format” pane to adjust colors, add labels, and configure the layout to highlight the most critical data.
Funnel Charts
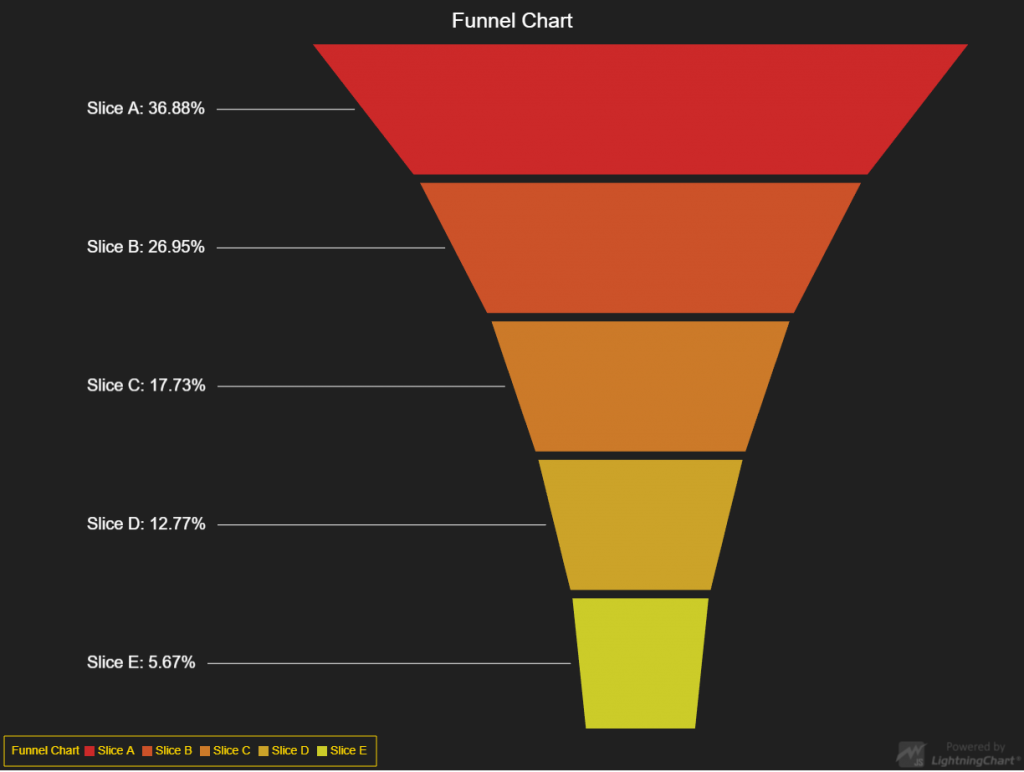
Funnel charts are excellent for illustrating stages in a process, such as sales pipelines. To create a funnel chart:
- Structure Your Data: Ensure your dataset includes fields representing stages in a process.
- Select the Funnel Chart: In the “Visualizations” pane, select the “Funnel Chart” icon.
- Assign Data Fields: Drag the field representing stages (e.g., Sales Stage) to the “Group” area and the values field (e.g., Sales Amount) to the “Values” area.
- Format the Chart: Use the “Format” pane to customize the appearance. You can adjust colors, add stage labels, and modify the funnel’s shape to improve clarity.
Waterfall Charts
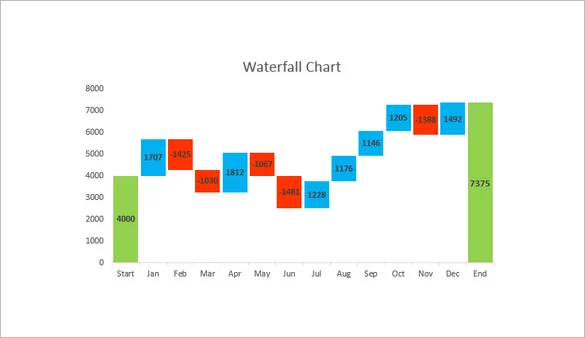
Waterfall charts help understand cumulative effects over time, such as financial performance. To create a waterfall chart:
- Prepare Sequential Data: Ensure your dataset includes sequential fields representing changes over time.
- Choose the Waterfall Chart: In the “Visualizations” pane, select the “Waterfall Chart” icon.
- Set Up the Waterfall Chart: Drag the sequential field (e.g., Period) to the “Category” area and the values field (e.g., Revenue Change) to the “Values” area.
- Enhance the Visual: Customize the chart through the “Format” pane. You can adjust colors, configure connectors between bars, and add labels to highlight significant changes.
Interactive Elements
Slicers
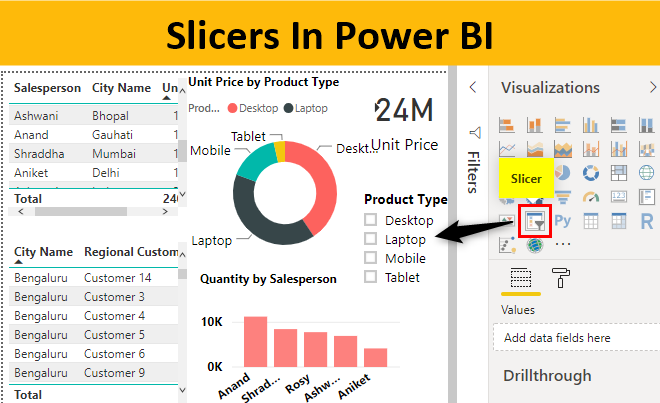
Slicers are interactive filters that allow users to segment data directly on the report. To add a slicer:
- Add a Slicer: In the “Visualizations” pane, select the “Slicer” icon.
- Set Up the Slicer: Drag the field you want to use as a filter (e.g., Product Category) to the slicer.
- Customize the Slicer: Use the “Format” pane to adjust the slicer’s appearance and behavior. You can choose between different slicer types, such as list or dropdown.
Drill-throughs
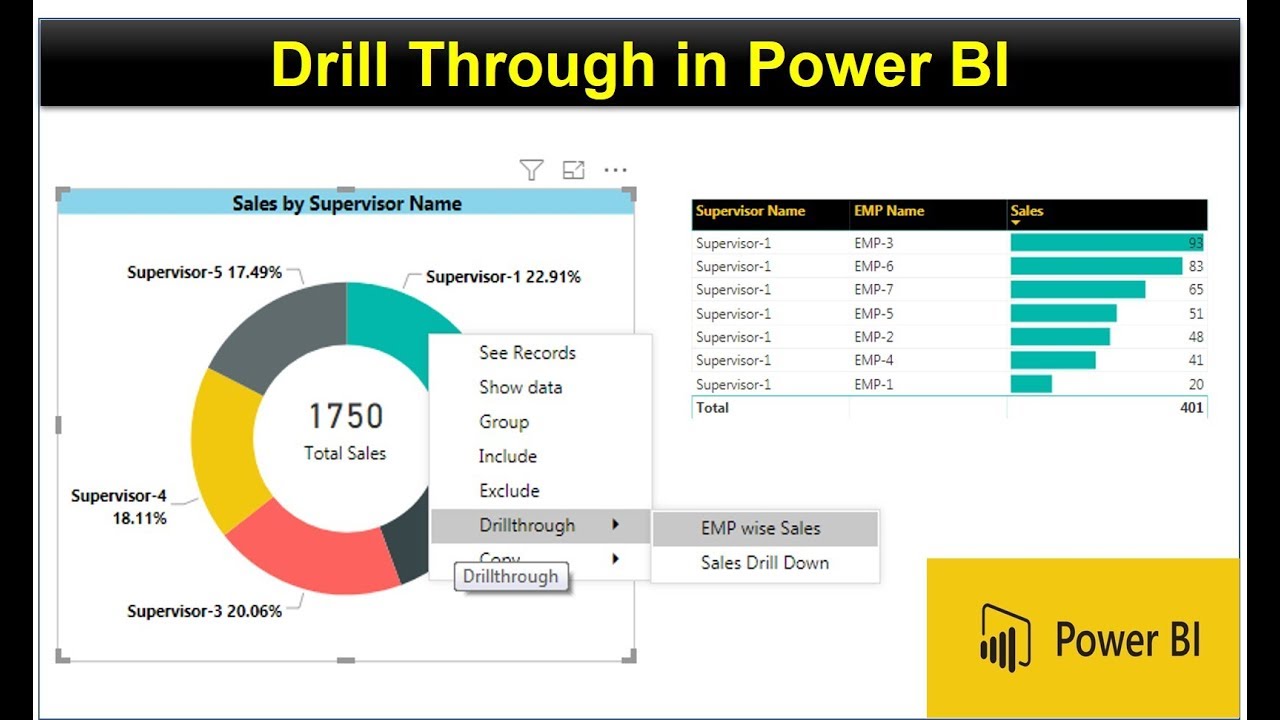
Drill-throughs enable a more profound data exploration by focusing on specific details. To set up a drill-through:
- Create a Drill-through Page: Add a new page to your report and design it to show detailed data.
- Set Up the Drill-through: On the drill-through page, add a field to the “Drill-through” area in the “Visualizations” pane.
- Configure Drill-through: Use the “Format” pane to enable drill-through actions and customize the interaction.
- Add Drill-through Button: Add a button or link to your main report page that users can click to access the detailed page.
Tooltips
Tooltips provide additional information when users hover over data points. To customize tooltips:
- Enable Tooltips: In the “Visualizations” pane, go to the “Format” pane and expand the “Tooltip” section.
- Customize Content: Add fields to the tooltip to display extra data. You can include measures, text descriptions, and other relevant information.
- Format Tooltips: Adjust the appearance of tooltips, such as font size and background color, to ensure they are clear and informative.
Custom Visuals
Custom Visualizations
If the default components in Power BI do not meet your needs, you can explore custom visuals from the Power BI marketplace or create your own. To use custom visuals:
- Explore the Marketplace: Go to the “Visualizations” pane in Power BI and click the “Import a custom visual” icon. Then, browse the Power BI marketplace for custom visuals that suit your requirements.
- Import Custom Visuals: Select and import the desired custom visual into your Power BI report.
- Add Data to Custom Visuals: Just like with default visuals, you can drag and drop your data fields into the custom visual.
- Customize the Visual: Use the “Format” pane to adjust the appearance and behavior of the custom visual, ensuring it meets your specific needs.
Power BI Tips and Tricks
To make the most out of Power BI, consider these tips put together by our Data Visualization Experts:
- Use Bookmarks: Bookmarks allow you to save the current state of a report page, including filters and visuals. This is useful for creating storytelling reports and presentations.
- Leverage Power BI Templates: Templates save time by allowing you to reuse report structures and settings. Customize templates to maintain consistency across reports.
- Optimize Performance: Reduce load times by filtering unnecessary data and using aggregations. Regularly monitor the performance of your reports to ensure they run smoothly.
- Stay Updated: Power BI is continuously evolving with new features and improvements. Stay updated with the latest releases and incorporate new functionalities into your reports.
The Final Word
According to Gartner, by 2025, data stories will be the most widespread way of consuming analytics, and Power BI is at the forefront of this revolution. By leveraging Power BI’s capabilities, businesses can enhance their decision-making processes, drive growth, and stay ahead of the competition. For those looking to elevate their data visualization capabilities, embracing Power BI is a strategic move. Whether you are a small business or a large enterprise, Power BI’s intuitive design and powerful features make it an essential tool in the modern data landscape.
Are you a business executive or enterprise owner looking for help leveraging Power BI for Data Visualization at your company?
At AffinityCore, we provide comprehensive data visualization services and custom healthcare data analytics solutions tailored to your business needs. Get the pending work done by the experts at AffinityCore with more than a 50% cost reduction. Moreover, you can also opt for our Offshore Staff Augmentation Services and designate an entire team to cater to your Data Visualization needs for half the cost.
Partner with us to unlock the full potential of your data.
Ready to transform your data? Connect with AffinityCore and see how our data visualization services can empower your business.
Visit AffinityCore to learn more and get started.